Last Updated on January 1, 2024
Is summertime too hot and humid in your RV? Need a quick cooling option or an additional one to supplement rooftop AC in your RV? If you are familiar with portable ACs, it would probably be the first idea that comes to your mind.
But why so? Because it is portable (as the name suggests) and requires almost no installation. You just have to pick the unit, place it in your RV, and vent its exhaust pipe out. But can you really use portable AC in your RV?
Portable ACs can help cool your RV and supplement cooling of their rooftop AC. Portable AC units typically require 120 volts and draw 5-15 amps. So they will work with most class A, B, and C RVs, provided the RV could provide enough power and portable AC is not too large for it.
Popular RVs and travel trailers are between 200 to 400 sq ft, so an 8000 to 12000 BTU unit will do.
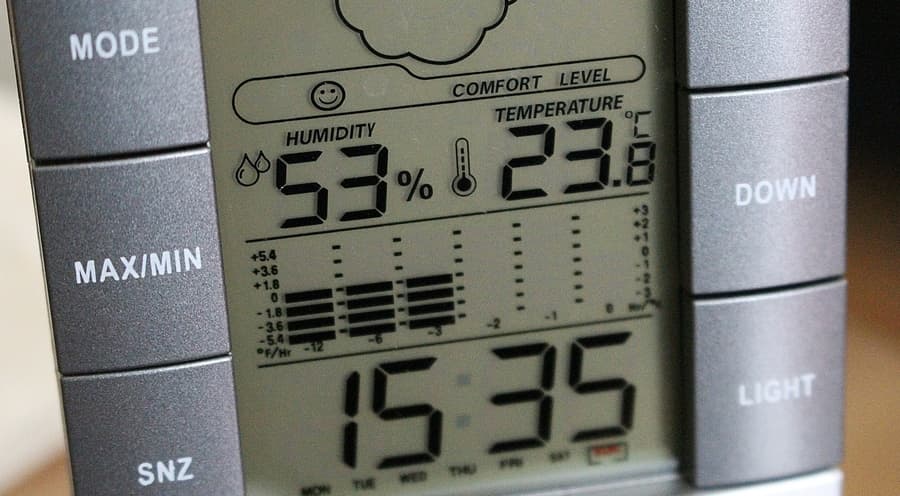
The capacity or BTU value that a portable AC should have to make your RV comfortable will mainly depend on its space and volume.
However, it will still vary, based on how hot and humid the region is, the number of occupants, and RV indoor activities like cooking and washing.
I wrote this article specifically to guide you in deciding if portable AC would help cool down your specific RV, especially when it is hot and humid outside. And if so, which one to have?
Is Portable AC Compatible with Your RV?
The kind of RV you have will decide whether a particular portable AC will be compatible with it or not. Even if it is compatible, it has to work effectively to cool the vehicle space properly.
Below is a little comparison of different kinds of RVs.
| Image | Type | Floor Space in Square Feet | Motorized/Towed | Built-in Generator |
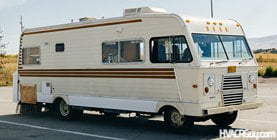 | Class A RV | 200-400 | Motorized / Built-in engine | Mostly, Yes |
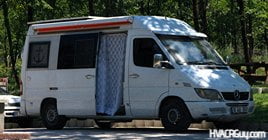 | Class B RV | 100-200 | Motorized / Built-in engine | Sometimes |
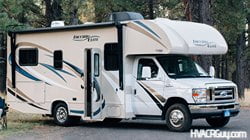 | Class C RV | 150-400 | Motorized / Built-in engine | Mostly, Yes |
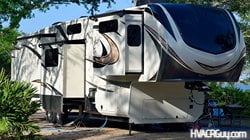 | 5th Wheel | 100-400 | Towed | No |
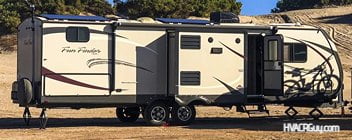 | Travel Trailer | 200-500 | Towed | No |
There is a lot of variety in RV. For any RV kind, it may be larger or smaller in size than the range given above. Similarly, all Class A, B, and C RVs may not have a built-in generator.
But most of the time it has the same features as provided in the table.
To check a Portable AC unit’s compatibility with your RV first compare the electrical voltages and ampere ratings of both.
Ensure that the input voltage (volts) of the AC unit matches the output voltage of your RV’s electrical system.
Most RVs have an electrical system of 120 volts and 30 amps or 50 amps (30 amps is more common).
Majority of portable ACs also run on a voltage of 120 volts. So for most units you will be good to go.
However, some portable AC units need 240 volts input. In that case, you will have to use an inverter to convert 120 volts to 240 volts to use it.
I personally suggest going with a portable AC that is of the same rating as the RV electrical system in the first place.
Secondly, see if the RV will be able to provide as many amps as needed by the portable AC. This won’t be a problem usually if voltage ratings match.
Next, select the right capacity portable AC for your RV. Opt for one with a BTU rating that matches the size of your RV space.
You cannot rely on a single 3000 BTU portable AC to cool a 250 square feet 5th wheel or travel trailer, especially where it is hot and humid like in the tropics.
Below I discuss the essential features to look for when selecting a portable AC for your RV.
Choosing Perfect Portable AC for Your RV: What to Look For?
1. Capacity or BTUs of Portable AC
Capacity or BTUs refer to the heat an AC can remove from RV space in one hour.
In other words, the more the BTUs of a portable AC the more cooling power it will have.
This means a 9000 BTUs portable AC will cool more than a 6000 BTUs portable AC. This also means it would cover a bigger space.
Normally for any space with a ceiling height of about 8 feet, you should select a portable AC with the following BTUs:
| Space to Cool | Required BTUs of Portable AC |
| 200 sq. ft. | 8000 |
| 300 sq. ft. | 10000 |
| 400 sq. ft. | 12000 |
| 450 sq. ft. | 13000 |
| 500 sq. ft. | 14000 |
This sizing is based on an 8-foot ceiling height, whereas an RV typically has a ceiling height of around 6.5 to 7 feet.
But I’d still go with the recommended BTUs in this table. This is to compensate for direct sunlight on the metal body, hot weather conditions, as well as cooking and showering activities inside the RV.
Note:
The capacity or BTUs recommended in this table are based on a single cooling source i.e., only a portable AC.
In case you want to supplement the cooling of a rooftop cooling system already installed in your RV, you may select a smaller unit.
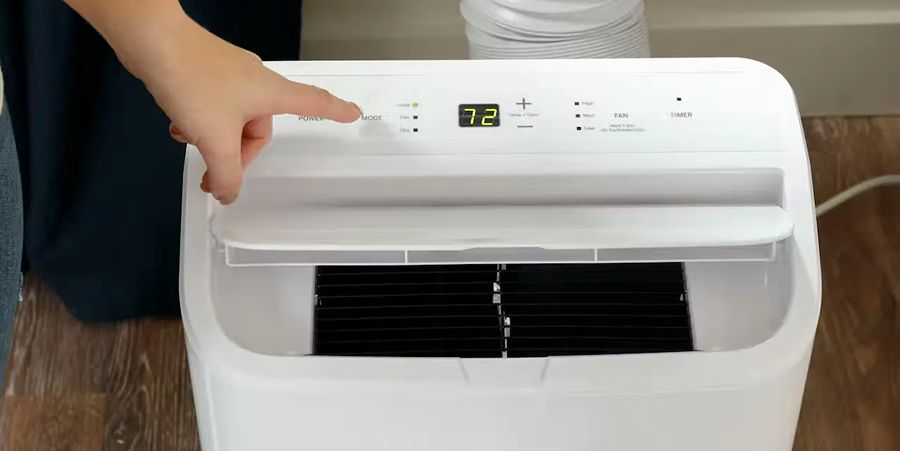
2. Mobility and Size of Portable AC
Portability and mobility are what make portable ACs called ‘portable’. However, the design, size, and weight of a portable AC unit decide how easy to move around it is.
This is a concern in an RV where space is limited. If the dimensions of a portable AC are relatively large, they will affect your ease inside the recreation vehicle.
Normally, the height of portable AC is around 2 feet and they are 1 to 2 feet wide and deep.
Among the best options choose the one as small as possible to have more space around.
3. Dual Hose vs Single Hose Portable AC
This is something less talked about when discussing portable ACs. For me, I would like to avoid single-hose portable ACs as much as possible.
Reason? Single-hose portable ACs are much less effective compared to Dual-hose portable ACs.
Single-hose portable ACs use a single vent pipe for exhaust. They draw air for cooling the condenser coils from inside.
This creates negative pressure within the RV, causing outside air to rush in, compromising cooling efficiency.
This problem is bypassed in a dual-hose portable AC. It takes air from one hose, and after cooling the condenser coils, exhaust from the other hose.
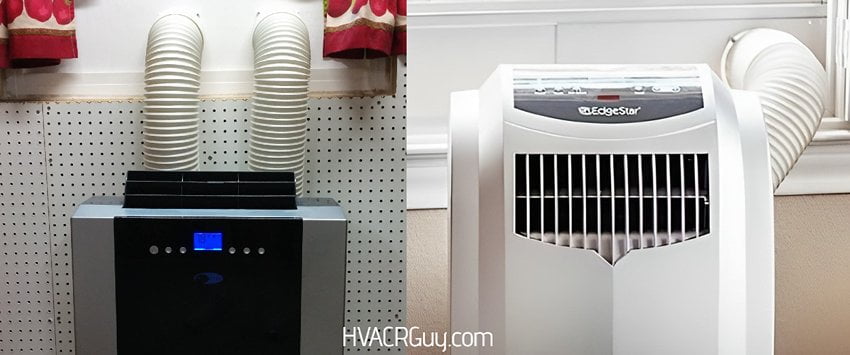
This is why they are much more effective at cooling than single-hose portable ACs.
Moreover, most of them have self-evaporation technology, which means they automatically expel moisture outside. You will not have to remove water from the AC’s condensate pan manually.
4. Electrical Specifications of Portable AC
It is a good idea to check the compatibility of your RV’s electrical system with the portable AC you plan to use in it.
I am an engineer who studied electrical systems and implemented them on many projects.
Most of the time, if the voltages of an electricity source and an electrical appliance are the same, they are compatible with each other, provided the amperage (current) ideally meets or exceeds the requirement of the appliance.
In other words, if the voltage output of your RV’s electrical system and the voltage input of portable AC are the same, they are compatible with each other if the RV’s electrical system can provide adequate amperage.
Normally, most RV electrical systems provide 120 volts with 30 amperes and most portable ACs also have an input of 120 volts with 10-15 amps of current requirement, so you will be good to go.
After you shortlist desirable portable AC units for your RV, it would be a good idea to discuss with a certified RV technician, before buying the best one among them.
Note: Many new luxurious and advanced RVs may come equipped with a 240-volt electrical system with a 50-amp current rating. In that case, you will have to use an inverter with the portable AC to make it compatible with the RV.
5. Location of Your RV
Where do you intend to park your RV, whether for camping or as residence?
For the same space, you will need a more powerful portable AC in the hot and humid tropics of Florida in summer, then let’s say a place where temperature and humidity conditions are more moderate like California.
That is why my advice is to select a portable AC that is a little larger in capacity than required for the RV space.
In this table, the capacity or BTU rating is already adjusted a little more than required. This will help compensate for regions with hot and humid weather.

6. Number of Occupants In RV
An average person at rest releases about 36000 joules of energy per hour which translates to about 820 BTUs per day.
Thereby the number of people in an RV will affect the BTU rating of the portable AC you plan to use inside.
If there are 1-2 more people in the RV besides you, it wouldn’t make a difference but when they are 4-5 then more heat and humidity removal will be needed, which means a bigger unit.
The additional BTUs for a higher ceiling will compensate for the additional cooling for a few more people inside the RV. You may also try the techniques I discuss later in the article to enhance cooling efficiency of your Portable AC.
7. EER Rating of Portable AC unit
EER or Energy Efficiency Ratio of portable AC means how efficient your portable AC will be in cooling your RV. More EER means more cooling per unit of electricity consumed.
EER = Cooling Capacity in BTUs / Power Input in Watts
This means among two portable AC units with similar cooling capacity, let’s say 8000 BTUs, a portable AC with higher EER will cool better while consuming less electricity.
After considering key factors for choosing your RV’s portable AC, I think you will like my recommended choice. Just ensure its size and electrical specification work for your RV.
How to Properly Install Portable AC in Your RV?
After selecting a suitable portable AC unit, you will have to install it properly in your RV. Here’s a simple step-by-step procedure to make that happen:
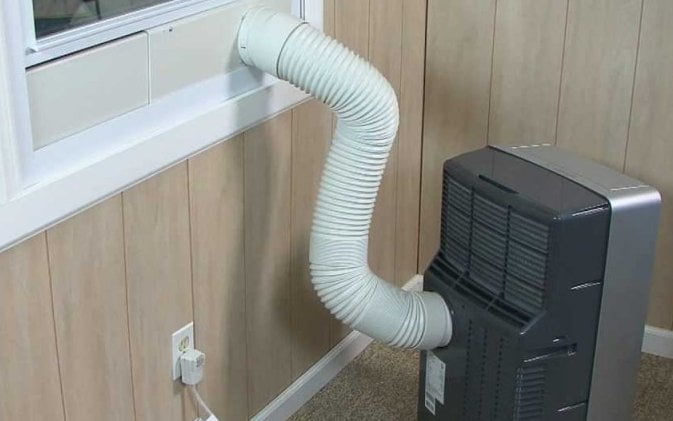
- Choose a spot for portable AC in your RV with ample space around the unit to accommodate its physical dimension and some space around it to allow free airflow.
- Place your portable AC close enough to a window or an outlet so that its hoses can intake and expel air outdoors.
- For venting through a window, try this window kit. Attach the portable AC vent hoses to the window kit, position it in the open window, and secure it by closing the window.
- If there are gaps, you may use this weather-stripping sealant tape to seal them easily.
- Periodically perform necessary light maintenance like cleaning filters and dusting them off. The best is to cover it when not used to prevent dust and dirt from going in.
Securing Portable AC In Your RV During Travelling
Following the steps above will make your RV all set for cooling via a portable AC, when it is stationary. This way you can have a peaceful sleep, and enjoy working and indoor activities.
But how to use portable AC when RV is moving?
When RV is in motion, sudden movements and jerks can potentially damage portable AC coils and compressor.
You may consider the following ways to secure and stabilize the position of portable AC in your RV:
If your portable AC unit has wheels, check if they can be locked. Locking the wheels can help prevent unintentional movement.
There are braces or straps specifically designed for securing appliances in RVs. These are adjustable and can be tightened to hold your portable AC unit in one place.
You may place non-slip matting or padding under the portable AC unit to enhance stability and reduce movement.
Depending on the spot where you place portable AC in your RV, you can use corner braces on the sides of the AC unit to provide additional lateral support.
Depending on the RV layout and the AC unit’s design, you may use adjustable bungee cords to secure the unit to nearby things to make sure it doesn’t move around.
Position the portable AC unit near sturdy furniture or fixtures within the RV. This will provide additional support and help stabilize the unit.
Attach Velcro strips or adhesive pads to the bottom of portable AC and the RV floor. This will help prevent sliding and shifting of the unit during movement.
The goal is to fix portable AC at a spot in your RV. You can get creative and do that as you wish.
It is a great idea to use multiple fixing options at a time for securing portable AC at a single spot (which I also recommend).
5 Ways to Supplement Cooling of Portable AC in Your RV?
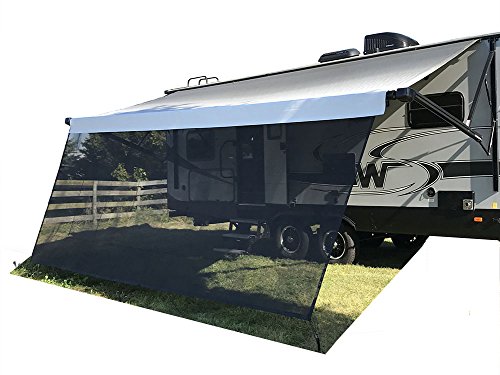
1. Extend Awning on RV
Deploying your RV awning in the right direction will enormously improve the cooling efficiency of the portable AC.
An awning will prevent direct sunlight on windows and the exterior metal surface of your RV.
With the awning deployed and positioned correctly, you will feel a noticeable effect on the temperature inside even without air conditioning.
Further, it will be a great spot for sitting outside and performing leisure activities.
If you have some time, have a look at my favorite awning in the market. It is UV-blocking with that adds 86% UV protection, cool shade, and a cool shield from the wind.
2. Install Heat Reflective Cover for Windows
Heat-reflective covers will form a barrier between your windows and outdoor heat. They will drastically reduce solar heat gain and prevent a lot of heat from moving in.
As a result, even with little cooling, you will be able to regulate the temperature inside your RV.
This one’s my choice. If you plan to have them, make sure you get the right size.
3. Shower and Cook Outdoors
Many indoor activities like cooking, showering, washing, etc. release a lot of heat and moisture.
I know it is not feasible many times to do them outside but try doing these activities outdoors as much as you can.
This will reduce a lot of work for your cooling source in reducing temperature and humidity, whether it be portable AC, rooftop AC, or both.
For example, when vacationing you could bring your stove outside and cook in the shade of your RV awning.
4. Park Your RV in Shade
This is obvious but try parking your RV where there will be the least direct sunlight exposure for most time.
This will help keep the temperatures normal, even when you are not using your air conditioning.
5. Improve RV Insulation
Much of the hot and humid air from outside gets in through leaks in windows. A good idea would be to ask an RV guy to seal your RV properly.
Alternatively, you could use this weather-stripping sealant tape I recommended earlier in this article.